Tuesday, May 17, 2016

Rhubarb Dream Bars


I'm not lucky enough to have my own rhubarb plants (I should do something about that) but I am lucky that friends and family share their bounty. I usually dice up the rhubarb and keep it in the freezer in 2 cup batches, which is perfect for when I come across a recipe like this! I made this for dessert for Mother's Day and it was a huge hit. Of course, most desserts that start with a shortbread crust are a huge hit. And this one is doubly good because of the rhubarb sitting on top of the aforementioned crust.

This dessert comes together quickly, which is another bonus. Served with vanilla ice cream, it's sure to be a hit at your house on any day!


Find more great stuff at Create, Link, Inspire, Clever Chicks, Fabulous, Full Plate, Foodie Friday, Friday Frenzy.

Rhubarb Dream Bars

Crust:
1 cup flour
2/3 cup powdered sugar
1/2 cup butter, cut into cubes

Filling:
2 large eggs
1 cup sugar
1/4 cup flour
1/4 tsp. salt
2 cups diced rhubarb

To make the crust: Pulse the flour, powdered sugar and butter in a food processor until the mixture resembles coarse crumbs. (If you don't have a food processor, combine the flour and sugar in a large bowl, then cut in the butter until the mixture resembles coarse crumbs.)

Line a 8-inch square baking pan with parchment paper, ensuring the paper comes up on the sides so you can lift the bars out later.

Press the crust mixture into the paper-lined pan and bake at 350 for 15 minutes. The crust will still remain very pale in color.

While crust is baking mix together eggs, sugar, flour and salt and whisk well. Stir in rhubarb. Pour onto the hot crust and continue to bake for 40-45minutes. Let the bars cool completely. Lift them out of the pan with the parchment paper edges and then cut into squares. Refrigerate the bars if you're not serving them right away, and refrigerate leftovers.

Recipe Source: Adapted from Noshing with the Nolands

Monday, May 16, 2016

Tortellini with Italian Sausage, Brussels and Mushrooms


Here are a few of my favorite things: brussels sprouts, mushrooms, easy dinners, yummy food, Italian sausage, parmesan cheese sauces, eating supper on the deck, leftovers that are better than the original dish for lunch the next day. Wow! This recipe has all of the above!

Lauren has a great blog,
Sew You Think You Can Cook
, with lots of recipes to choose from. I was happy to be assigned to it for Secret Recipe Club as I had made the Candy Cane Bundt Cake for our Christmas reveal last November. I loved perusing her blog then, and it was even more fun this time cause I could choose from ANY recipe, not just the Christmas-themed ones!


So, as I said above, I love all the ingredients in this recipe! And I love that it comes together quickly for a weeknight dinner. And I love that it tastes great. And that the leftovers the next day are excellent as well. I also think that you could "trick" your kids (if you need to!) by using all shaved brussels in this recipe - I put mine through the food processor to slice them... of course, the mushrooms might prove to be trickier to disguise (what is it with kids and mushrooms by the way???).


In any case, make this pasta dish!

Find more great recipes at Inspiration Monday, Mix it Up.

Tortellini with Italian Sausage, Brussels and Mushrooms

18 oz cheese tortellini or ravioli
2 links Italian sausage, casings removed
1 Tbsp. butter
1 Tbsp. olive oil
2 cups chopped mushrooms
2 cups sliced Brussels sprouts
2 tsp. minced garlic
1/2 tsp. rosemary leaves, crushed
1/4 cup chicken broth
1 1/2 C milk
1 1/2 Tbsp. flour
3/4 cup shredded Parmesan

Bring a large pot of salted water to a boil. Cook pasta according to package directions. Strain, reserving some of the cooking liquid.

Meanwhile, in a large skillet, over medium-high heat, cook the sausage, breaking it up. When fully cooked remove with a slotted spoon and set aside.

Add olive oil and butter to the skillet. Saute mushrooms, Brussels sprouts, and rosemary until tender, about 8 minutes. Season with salt and pepper. Add the garlic and cook another 60 seconds, until fragrant. Add the chicken broth, and scrape up any stuck bits in the pan, and cook and stir until the liquid has evaporated.

In a measuring cup whisk together the milk and flour. Slowly add the milk to the pot, stirring to prevent lumps. Bring to a gentle boil and melt in the cheese. Add in the cooked ravioli and sausage. If the sauce is too thick, add some of the reserved pasta water. Serves 6.


Monday, May 9, 2016

Blackberry Muffins


Blackberries have been so plentiful, and so reasonable, this year! I love eating them on granola, in oatmeal, in salads, and just plain. I like baking with them too. Muffins are a real staple at our house so I'm always looking for a new muffin recipe. I was happy to find one to use my beloved blackberries and make it easy for the kids (and adults!) to get out the door in the morning, and on time...


These muffins are simple to put together. They are bursting with berries and a great start to the morning. The key to any delicious, tender muffins is not to overmix the batter, and the same is true here. Sour cream or yogurt will add to the tender crumb so don't worry if there are a few lumps. Put away your perfectionist tendencies and the outcome will be wonderful!


Find more great stuff at Inspiration Monday, Mix it up, Create Link Inspire, Clever Chicks, Fabulous, Show and Share.

Blackberry Muffins

2 1/2 cups flour
1 Tbsp. baking powder
1/2 tsp. baking soda
1/2 tsp. salt
1/2 tsp. cinnamon
2 eggs
1 cup sour cream or greek yogurt
1 tsp. milk
1 cup sugar
4 Tbsp. melted butter
1 tsp. vanilla
1 1/2 cups blackberries, fresh or frozen (cut in half if large)

Whisk together the flour, baking powder, baking soda, cinnamon and salt in a large bowl. In a large batter bowl, whisk together eggs, sour cream, milk, sugar, butter and vanilla. (I like to melt the butter in the batter bowl and then add the other ingredients - one less dish to wash!)

Add dry ingredients to the wet ones, then fold in the blackberries.

Divide the batter evenly among greased or paper-lined muffin cups. Bake at 400°F for 17-20 minutes, or until a toothpick inserted into the middle comes out clean.

Let cool in the pans for 2 to 3 minutes before removing to a wire rack to cool completely.


Recipe Source: Adapted from Simply Recipes

Monday, May 2, 2016

Strawberry Magic Bars


I think strawberries just scream spring. So when I needed a dessert for a recent party at work, I thought this would be perfect. And it was. There are several layers and steps, but they create a delicious dessert - and maybe that's why they are called Magic!

There's a graham cracker crust, with a sugar cookie layer, then TWO strawberry layers, white chocolate and sweetened condensed milk... Oh my. Sweetness.


These bars need to chill overnight in the fridge so plan accordingly. But do plan to make them. They will make your Spring tasty!

Get more great stuff at Inspiration Monday, Mix it Up, Full Plate, Hearth and Soul, What's Cooking, Wow Me, Wow Us, Foodie Friday, Friday Frenzy.

Strawberry Magic Bars

9 graham cracker sheets (one sleeve), crushed
4 Tbsp. butter, melted
2 Tbsp. sugar
1 1/4 cup flour
1/4 tsp. salt
1/4 tsp. baking powder
3/4 cup sugar
1/2 cup butter, softened
1 tsp. vanilla
1 egg
1/2 cup quartered fresh strawberries, pureed
4 oz cream cheese, softened (low fat is ok)
3/4 cup thinly sliced fresh strawberries
1/2 cup white chocolate chips
1/2 cup sweetened condensed milk

In a large bowl, mix together the graham crackers, 4 Tbsp. of butter (melted) and the 2 Tbsp. of sugar. (Alternatively you can crush the graham crackers in a food processor and then add the melted butter and sugar and pulse until combined.) Press into the bottom of a greased 9x13 pan.

In a different bowl, mix together 1 1/4 cup flour, 1/4 tsp salt, and 1/4 tsp baking powder, set aside.

Beat together 3/4 cup sugar and 1/2 cup butter until creamy, about two minutes. Add in the egg and then the vanilla until just combined. Slowly add in the flour mixture until it is fully combined.

Very carefully layer the cookie dough mixture on top of the graham cracker crust by picking up small amounts of dough, flattening it in your hands, and setting it on the crust. You may not be able to entirely cover the graham cracker crust, but it will spread slightly when baking.

Beat together the cream cheese and the pureed strawberries. Spread evenly over the cookie dough.

Evenly spread the sliced strawberries over the cream cheese layer. Top with the white chocolate chips and then cover with the sweetened condensed milk.

Bake at 350 for 30 minutes. Refrigerate overnight before slicing. Store in the refrigerator in an airtight container.

Recipe Source: Adapted from Wine and Glue

Monday, April 25, 2016

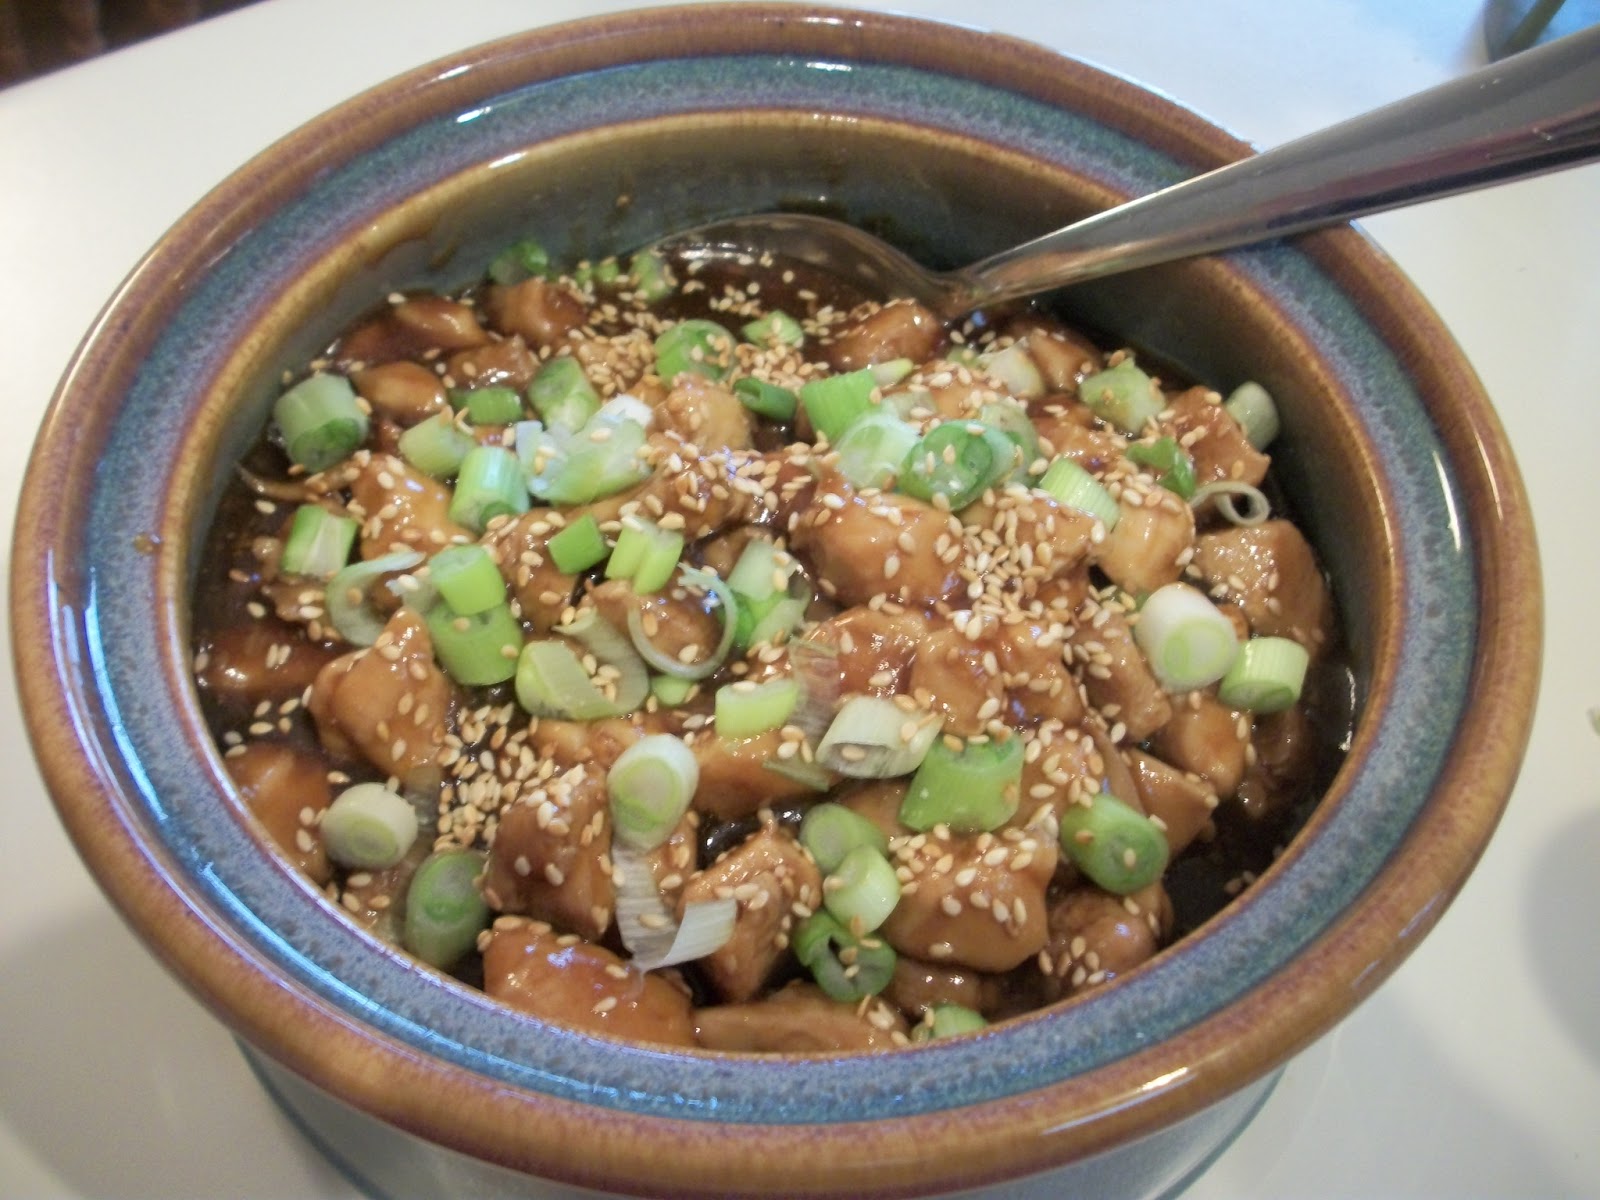
Honey Sesame Chicken {Instant Pot Recipe!}


I got an Instant Pot for my birthday! If you are not yet on the Instant Pot bandwagon, it is an electric pressure cooker. My knowledge of pressure cookers was pretty limited. I only knew of the stove top version and the propensity to "blow up." I didn't want to be part of that. But when I started reading about this new-fangled pressure cooker that was electric and could do multiple types of cooking (rice!, yogurt!, steam!, saute!, stew!) and could make meals in mere minutes, I knew I wanted to learn more.

I've now become a believer. Not only is the pressure cooker fast, it makes delicious food! (Of course, it matters what you put in it, but we'll get to that.) So far, I've tried beef ribs, chuck roast, steel cut oats (3 minutes, people!) and this delicious chicken dish.


Unlike a crock pot, you can do multiple-step dishes in the Instant Pot. For this recipe, you saute the chicken briefly with the aromatics, before bringing the pot to pressure and fully cooking the meat. Then at the end, you return to the saute setting to thicken the sauce. And you wash one pot!

A note of caution: although this chicken only "cooks" for 4 minutes in the pressure cooker, it does take a bit of time for the pot to come to pressure before the 4 minute count down begins. So plan your rice and side vegetables accordingly! (This is the one thing I still need to get used to - the "advertised" time doesn't include the warm up time, which can be significant, especially if there's a lot of liquid in the pot.)


In any case, this is an absolutely delicious meal, devoured by everyone in my family and making enough for leftovers for lunch the next day. I served it on rice with a side of sauteed green beans and snap peas, and it was a wonderful combination. Here's to more pressure cooking in the future!

Find more great recipes at Inspiration Monday, Mix it Up, Create Link Inspire, Clever Chicks, Tasty Tuesday, Fabulous, Show and Share, Hearth and Soul, What's Cooking, Wow Us, Wow Me.


Honey Sesame Chicken

4 boneless skinless chicken breasts, diced (about 2 1/2 lbs.)
1 Tbsp. vegetable oil
1/2 cup diced onion
2 cloves garlic, minced
1/3 cup soy sauce
2 Tbsp. ketchup
1/4 teaspoon red pepper flakes
2 tsp. sesame oil
2/3 cup honey
2 Tbsp. cornstarch
3 Tbsp. water
2 green onions, chopped
1 tsp. sesame seeds, toasted

Season chicken with salt and pepper. Set the pressure cooker to saute and let it heat up. Add oil, onion, garlic, and chicken to the pot and saute stirring occasionally until onion is softened, about 3 minutes.

Add soy sauce, ketchup, and red pepper flakes to the pressure cooking pot and stir to combine. Set the cooker to manual (high pressure) for 4 minutes. At the end of four minutes, turn pressure cooker off and do a quick pressure release.

Add sesame oil and honey to the pot and stir to combine. Turn pressure cooker to saute mode, then dissolve cornstarch in water and add to pot. Simmer until sauce thickens. Serve over rice sprinkled with sesame seeds and green onions. Serves 6-8.

Recipe Source: Adapted from Pressure Cooking Today

Monday, April 18, 2016

Mango Coconut Muffins


I love muffins. They are a staple at my house, appearing weekly to help aid in the "gotta get out the door but need to eat breakfast" situation. I especially like it when I can make muffins that have some nutritional value and aren't just an excuse to eat cake for breakfast. So I was excited that this month for Secret Recipe Club I was assigned to Sarah's blog, The Pajama Chef where I found an amazing recipe: Mango Coconut Muffins.

These muffins use coconut oil and are studded with delicious and vitamin A- and C-packed mangoes. To amp up the "tropical" quotient, they also have coconut and almond extract. You can just imagine that you're on a sandy beach soaking up the sun when you eat one of these muffins!


I used frozen mango for this, and just let them thaw slightly before chopping. If you have fresh, that's great, but frozen works well, too. You can also use a combo of regular and whole wheat flour, and experiment with different extracts. I used almond, cause it's my favorite, but vanilla or coconut would be delicious, too.

Thanks, Sarah, for a great recipe and for making my mornings brighter!

Get more great recipes at Inspiration Monday, Mix it Up.

Mango Coconut Muffins

2 cups flour (or use 1 c. all purpose and 1 c. white whole wheat)
1 Tbsp. baking powder
3/4 cup sugar
2 tsp. cinnamon
1/2 tsp. nutmeg
1/2 cup buttermilk
1/2 cup milk
1/4 cup coconut oil, melted and cooled
1 egg
1 tsp. almond extract
1 cup diced mango, fresh or frozen
1 cup shredded coconut, divided

In a large bowl, whisk together flour, baking powder, sugar, cinnamon, and nutmeg. In a separate bowl stir together buttermilk, milk, coconut oil, egg, and almond extract. Fold wet ingredients into the dry ingredients, then gently fold in mango and 1/2 cup of the coconut.

Divide batter evenly between 12 paper-lined muffin cups and then top with remaining coconut.

Bake at 400 for 17-20 minutes or until a toothpick inserted in the center comes out clean. Cool completely. Store in an airtight container for up to 3 days and then freeze leftovers.


Tuesday, April 12, 2016

Green Chile Chicken Enchilada Stack


I love Mexican food. Luckily, so does my family. Tacos, taco salads and enchiladas are common in the rotation. I really love enchiladas, but sometimes I just don't want to roll up all those tortillas. Luckily, there's another option. This enchilada stack has all the tasty goodness of green chile chicken enchiladas, layered up in a springform pan. Just cut into pie-shaped wedges and voila! Great taste, easy peasy.

My family is a also a huge fan of guacamole, so I served these up with heaping spoonfuls of guac, salsa, and additional sour cream. You could also serve chopped tomatoes, cilantro, onions, or whatever else you like to dress up Mexican food with!

(And for those of you who love leftovers, we especially liked the two remaining pieces as leftovers a couple nights later - it seemed like flavor intensified.)

Ole!

Find more great stuff at Inspiration Monday, Mix it Up, Create Link Inspire, Clever Chicks, Try a New Recipe, Tasty Tuesday, Fabulous, Show and Share, Hearth and Soul, What's Cooking, Wow Us, Wow Me, Full Plate, Foodie Friday, Friday Frenzy.

Green Chile Chicken Enchilada Stack

Sauce:
2 Tbsp. butter
1/2 cup chopped onion
2 Tbsp. flour
1/3 cup chicken broth
1/4 cup milk
1/4 teaspoon salt
1/4 teaspoon pepper
1 can (7-8 ounces) green chile enchilada sauce
1/2 cup sour cream, light or regular

For Stacking:
4 white or whole wheat 9- or 10-inch tortillas
2 cups cooked, shredded chicken
4 ounces medium or sharp cheddar cheese, shredded (about 1 cup)
4 ounces Monterey Jack cheese, shredded (about 1 cup)

For Serving:
Additional sour cream
Guacamole
Salsa
Or any of your favorite Mexican fixings!

For the sauce, in a large nonstick skillet, melt the butter over medium heat. Add the onion and cook, stirring occasionally, until the onion softens and starts to turn translucent, about 3-4 minutes. Sprinkle the flour over the onions and stir well. Cook for 1 minute, stirring. Slowly whisk in the chicken broth and milk. Cook over medium heat until the mixture is bubbling and has thickened, about 4-5 minutes. Remove the skillet from the heat and stir in the enchilada sauce, sour cream, salt, and pepper.

To assemble, lightly grease a 9- or 10-inch springform pan (depending on the size of the tortillas you are using). You may need to trim your tortillas to fit in the pan. Assemble by layering one tortilla, topping with sauce, chicken and cheese; then adding one tortilla, sauce, chicken, cheese; one tortilla, sauce, chicken, cheese; one tortilla, remaining sauce and cheese. (Basically it's four layers of nearly the same thing except the final layer doesn't get any chicken.)

Bake at 400, uncovered, for 20-25 minutes.

Let the enchilada stack rest for 10 minutes before serving. Cut into pie-shaped wedges to serve and garnish with your desired toppings.

Recipe Source: Mel's Kitchen Cafe
Powered by Blogger.