Monday, March 28, 2022

Sourdough Waffles


We love waffles at our house. They are a traditional Saturday or Sunday brunch (or lunch) item. (When you have teenagers, they call it breakfast. For me, it's lunch. Ha!) I almost always make my favorite oat waffles, and sometimes I change it up with bananas or pumpkin, but these.  These sourdough waffles.


These waffles are SO good. They truly melt in your mouth. And the overnight sponge gives them just enough sour flavor to be SO incredibly delicious. How many times can I capitalize SO? 

These do take an extra little bit of effort, since you prepare the sponge the night before, then let it sit out on the counter all night. This seems weird, especially with two cups of milk included, but it's what gives these waffles their outrageous lightness and flavor.


These also only work if you have a sourdough starter. I know. I really try to refrain from posting recipes that are too specialized, and this is one. However, if you don't have a friend to give you some starter, you can make your own. I assure you that it will be worth it! Plus once your starter is activated and ready to go, you can make bread, too! I've been making our sourdough bread and it's SO good. (There I go again with the capital SO.)


Make these waffles and have a great day, or weekend. You'll still be thinking about them hours and days later, I promise!

Sourdough Waffles

Sponge:
2 cups flour
2 cups buttermilk
1 cup sourdough starter (discard is fine too!)
2 Tbsp. sugar

Batter:
2 eggs
1/4 cup vegetable oil
3/4 tsp. salt
1 tsp. baking soda

For the sponge, in a large bowl or batter bowl, combing the flour, sugar and buttermilk and whisk well. Stir in the starter, then cover and let sit in a cool place (or on the counter if your house is not above 70!) for 8-12 hours. 

(If there is a time lapse between the 12 hours and making the waffles, it's ok to stick the batter in the fridge. For example, I made the sponge on Saturday night, put in the fridge 12 hours later, then returned from church to finish the recipe.)

Add the eggs, oil, salt and baking soda to the sponge and stir well to combine. It will also "grow" because of the baking soda, so hopefully your bowl was big enough!  

Pour the batter onto a preheated waffle iron. Note that sourdough waffles spread quite a bit, so you might want to use less than "normal."  Cook according to your waffle maker's guidance.  Enjoy with syrup, berries and cream, or your favorite toppings!


Tuesday, March 22, 2022

Korean Beef Sloppy Joes


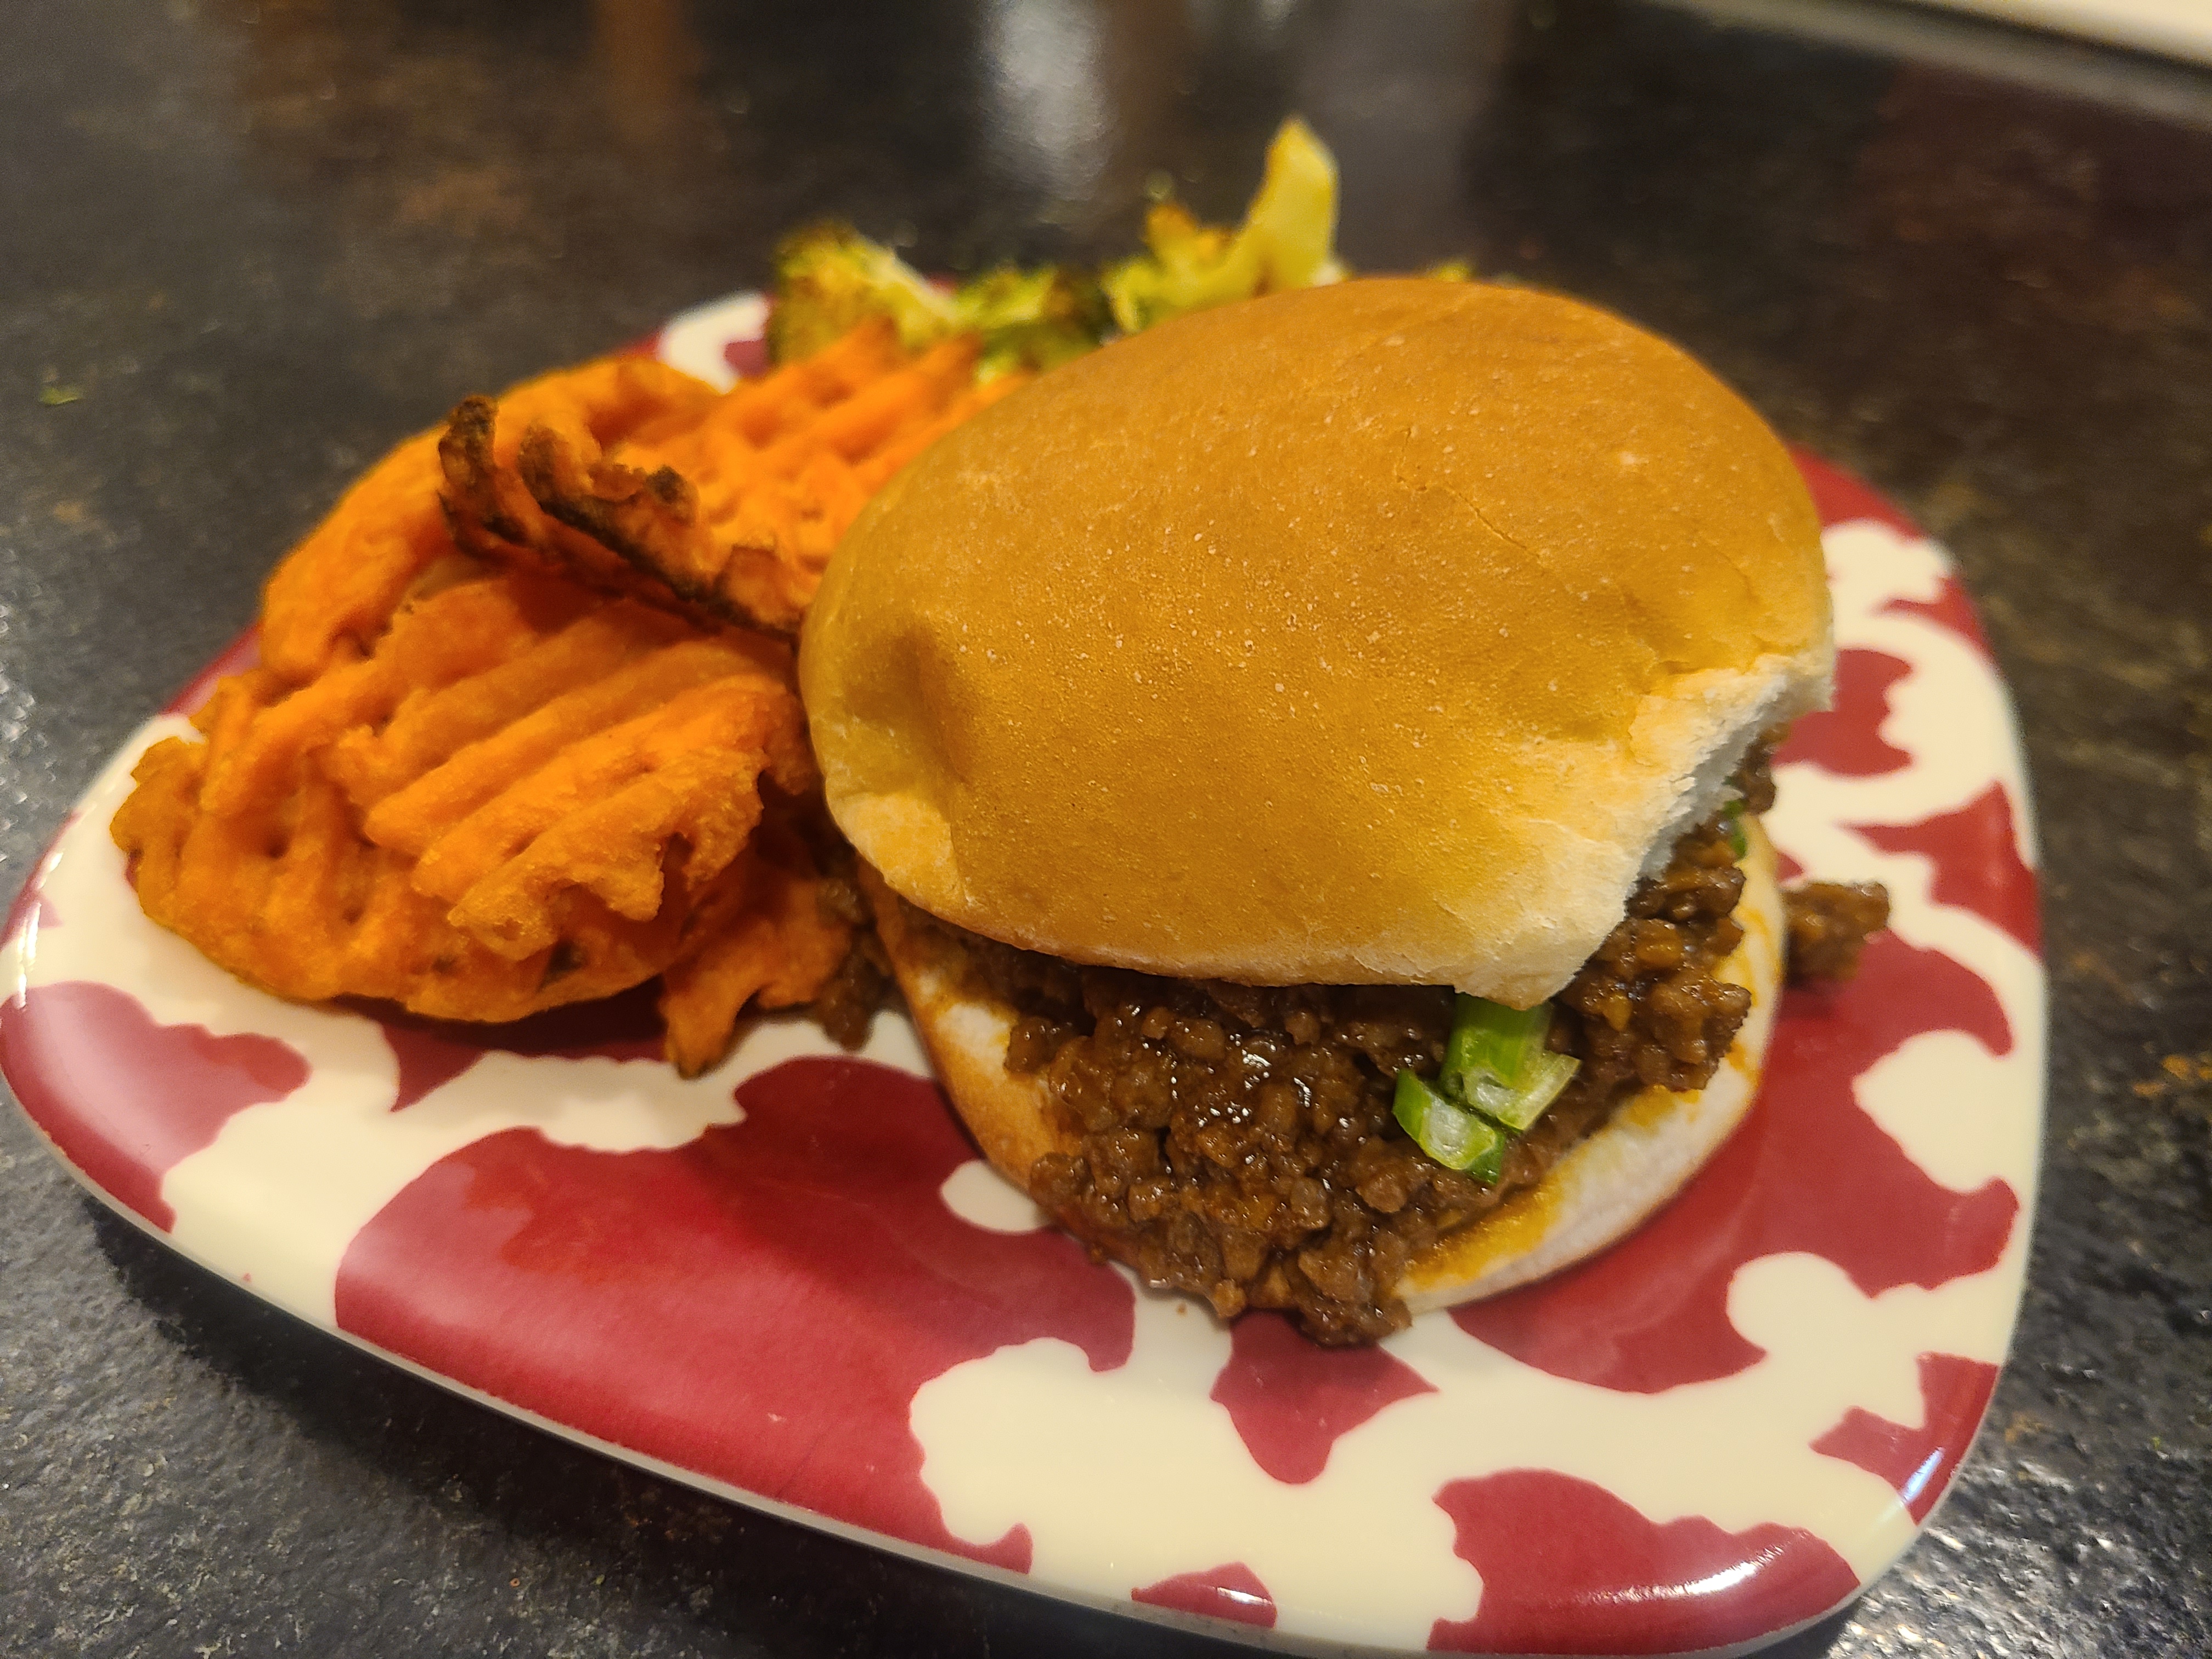
At our house, we love Asian flavors and I'm always game for a fusion - combining two different styles into one food. These Korean Beef Sloppy Joes are just the ticket! Similar to a regular sloppy joe in substance, but with a much tangier, kickier flavor.(Kickier is not technically a word, however it is a great descriptor here, so I'm going to go with it.) 


I also liked that these sloppy joes were not as, well, sloppy, as the traditional recipe that I make. And let's be clear, I love sloppy joes. They are often my request at our family birthday dinner! But this year, these Korean Beef Sloppy Joes won the day. And everyone at the party agreed that they are fantastic.

We enjoyed these at home with sweet potato fries and roasted broccoli, and at the birthday party the Asian Coleslaw (or try this one with mangoes!) was the perfect accompaniment. Followed by cake, of course!


So whether you're having a party, or it's just a regular day, these Korean Beef Sloppy Joes are sure to be a hit. I hope you enjoy them as much as we do!

Korean Beef Sloppy Joes

1 1/2 pounds ground beef
3 cloves garlic, minced
2 tsp. sesame oil
1/2 cup ketchup
1/2 cup hoisin sauce
1/4 cup water
2 Tbsp. soy sauce
1 Tbsp. rice vinegar
1 tsp. chili garlic sauce
2 green onions, thinly sliced
6 hamburger buns, lightly toasted

In a large skillet over medium heat, brown the ground beef, breaking it up slightly with a spoon or spatula. Be sure to leave some larger chunks of meat, so don't break it up entirely. Drain any fat.

Add the garlic, sesame oil, ketchup, hoisin sauce, water, soy sauce, vinegar and chili garlic sauce. Stir well to combine, then bring to a light simmer and let simmer for 5 minutes to combine the flavors. If it's not sloppy enough, add up to 1/4 cup more water. 

Spoon the meat mixture onto the bottom half of the buns, and then garnish with green onions. Top with the other half of the buns.  Serves 6. 


Monday, March 14, 2022

Bailey's Brownies


Thursday this week is St. Patrick's Day. And if you like to get in the spirit with what you cook and bake, you should definitely consider Irish Stew, Beer Bread, Lucky Charms snack mix, or other traditional foods like Corned Beef and Cabbage or Soda Bread. You should consider those. That makes sense. 


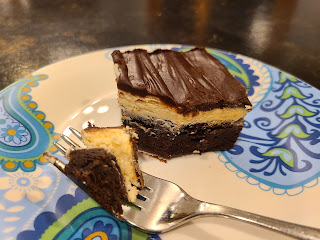
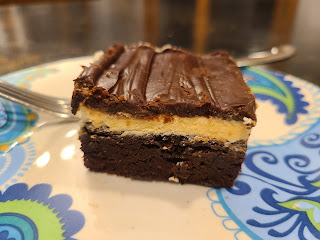
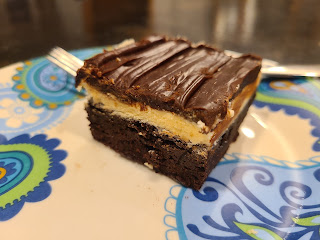
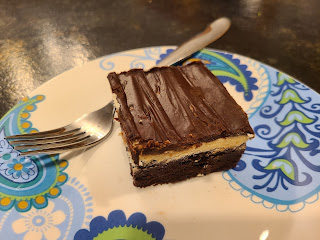
But you should DEFINITELY make these Bailey's brownies for dessert! These nearly defy description. But I will try. Fudgy brownies that you make from scratch are the base for all the Irish Cream goodness. Now, these are super simple to make from scratch, but if you wanted to, you could easily just whip up a box mix. Don't let the from scratch deter you.


A thick layer of Irish Cream frosting is next, topped by a glossy ganache, again laced with Irish Cream. 


These brownies are SO good. It's likely that you will dance an Irish jig or break out into O Danny Boy or something like that, you just won't be able to help yourself. 

And I promise, you won't need the luck of the Irish when these brownies are in your life. 


Bailey's Brownies

Brownies:
1 cup sugar
1/2 cup butter
2 eggs
3/4 cup plus 2 Tbsp. cocoa powder
1 tsp. vanilla
1/4 tsp. salt
1/2 cup flour

Frosting:
6 Tbsp. butter, softened
1/4 cup Bailey's Irish Cream
2 cups powdered sugar

Ganache:
1/2 cup chocolate chips
1/4 cup Bailey's Irish Cream
2 Tbsp. half and half or cream

For the brownies, place the butter in a large glass bowl or batter bowl and cook at 50% power in the microwave until the butter is melted. Let cool slightly, then add the sugar and mix well. Add the eggs one at a time, mixing after each, then stir in the cocoa powder, vanilla, and salt. Finally, add the flour and beat vigorously until the batter pulls away from the side of the bowl. 

Line an 8" pan with foil or parchment paper, then grease the foil. Scrape the batter into the pan and spread it out evenly. Bake at 325 for 25-30 minutes or until a toothpick comes out with some crumbs attached. You want them to be fudgy but not dry.  

Cool the brownies completely before adding the frosting and ganache.

For the ganache, using an electric mixer, beat the butter and Bailey's together until smooth. Gradually add the powdered sugar until it is thick and creamy. Spread the frosting over the brownies and then put in the freezer while you make the ganache.

For the ganache, place the chocolate chips in a small heat-proof bowl. Heat the Bailey's and the half and half in the microwave or in a small saucepan on the stove until it just starts to boil. Remove from the heat and pour over the chocolate chips. Let stand for 5 minutes, then stir well until glossy. Remove the brownies from the freezer and pour ganache over. Let them sit at room temperature for half hour, then refrigerate for several hours before serving. 


Tuesday, March 8, 2022

Sour Cream Coffeecake


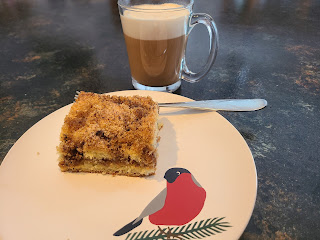
Coffeecake is such a luxurious breakfast or morning treat. Especially when it's layered and topped with streusel. This cake, that you can eat for breakfast because of its clever name, will get your day off on the right foot. Paired with a steaming hot cup of coffee, and maybe even scrambled eggs if you're fancy, you will feel like you can tackle the world.


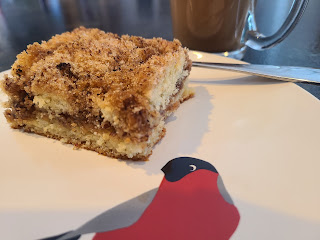
Just look at those yummy layers - it even makes the bird on the plate jealous! ha! Seriously though, a super tender crumb with sugary, buttery streusel in the middle, topped with more cake and streusel - every bite is a marvel. I usually don't use a lot of flowery language here, but sour cream coffeecake deserves every accolade.


I hope you will make this soon - you probably have the ingredients already! - and that your family and friends will love it as much as we do.


Sour Cream Coffeecake

1/2 cup butter 
1/2 cup sugar
1 egg
1/2 cup sour cream
1/2 tsp. vanilla
1 cup flour
1/2 tsp. baking powder
1/4 tsp. baking soda

Streusel:
1 cup pecans, chopped
1 tsp. cinnamon
1/4 cup brown sugar

In a large mixing bowl, beat butter and sugar until light and creamy. Add egg and mix again, then add sour cream and vanilla and beat until combined. 

In a separate bowl, combine flour, baking powder and baking soda. Gradually add this mixture to the butter mixture and mix just until combined.

Spoon half of the batter into a greased 8" pan. Smooth into an even layer.

In a small bowl, combine pecans, brown sugar and cinnamon. Sprinkle half of this streusel over the batter.  Spoon remaining batter on top of the streusel, and smooth as well as you can. Then sprinkle remaining streusel over the top.

Bake at 350 for 35-45 minutes.  Tent with foil if the cake is browning too much after about 25 minutes. (Mine did not need the foil.)

Cool for at least 10 minutes. Leftovers can be frozen or stored in an airtight container. 


Monday, February 21, 2022

Red Curry Ramen with Pork


Well, it's time for another soup recipe. Today in the north we are supposed to get pummeled with more snow, so there's no better time to enjoy a piping hot bowl of red curry ramen! This soup is a flavor explosion. Red curry with coconut milk alone is enough to make me swoon, but combined with ground pork, cilantro, and a soft boiled egg it becomes truly spectacular.


I even snuck some spinach in there, which, while not traditional in the least, does have good nutritional value. And I don't know about your family, but mine will easily eat spinach in soups and pasta dishes so I take advantage of that! 

This recipe is a little different than most soups in that the meat is cooked separately and then added on top. Adding fish sauce to the meat gives a very distinctive Thai flavor. (Fish sauce can be found in the Asian aisle at most large groceries. A large bottle will last several years...)


I found some new Ramen noodles at Costco recently made from brown rice. They come individually nested in a package so I used those instead of the "college Ramen" packets you would normally buy. If you're using those, I found that 4 of the "nests" were enough in this recipe, and we got 6 servings from this recipe. (Most people in our house had half an egg on their ramen, make enough eggs as your family likes!)

I hope you enjoy this new take on Ramen, and that you're staying warm this winter!

p.s. If you love ramen, and especially if you love bok choy, be sure to try this Gingery Pork Ramen with Bok Choy, too!

Red Curry Ramen with Pork

  • 2 - 3.5-ounce packages instant ramen noodles
  • 1 1/2 Tbsp. canola oil
  • 1/2 cup diced onion
  • 3 Tbsp. red curry paste
  • 2 Tbsp. tomato paste
  • 4 cloves garlic, minced, divided
  • 1 Tbsp. freshly grated ginger
  • 1 - 13.5 oz. can coconut milk
  • 4 cups chicken broth
  • 5 oz. baby spinach, chopped
  • 2 tsp. toasted sesame oil
  • 1 pound ground pork
  • 2 Tbsp. fish sauce
  • 1/2 cup cilantro leaves, chopped
  • 1 Tbsp. sesame seeds, black and/or white 

  • Cook noodles in a large pot of boiling water for 2-3 minutes, then drain and run under cold water. Drain again. Set aside. 

  • Heat canola oil in Dutch oven over medium heat. Add chopped onion, 2 cloves minced garlic, and ginger, and cook, stirring frequently, until tender, about 3 minutes. Stir in curry paste and tomato paste, and cook until fragrant, about 2 minutes.

  • Stir in coconut milk and chicken broth. Bring to a boil; reduce heat, cover and simmer until flavors have blended, about 8-10 minutes.

  • Heat sesame oil in a large skillet over medium high heat. Add pork and remaining minced garlic. Cook until pork has browned, about 3-5 minutes, making sure to crumble the pork as it cooks. Stir in fish sauce; season with salt and pepper, to taste.

  • Add the spinach to the broth, and stir until wilted. Into individual bowls, add noodles, then broth, then top with port, egg halves, and cilantro. Top with sesame seeds. Serves 4-6.

Recipe Source: Adapted from Damn Delicious

Wednesday, February 9, 2022

Spinach and Artichoke Stuffed Bread


Spinach and Artichoke Dip is one of the best inventions ever, am I right??? I love it with pita or tortilla chips, and it is great party food. But stuff it into Italian bread, and we've got a whole nother situation. (do you say "a whole nother" in your region?) 


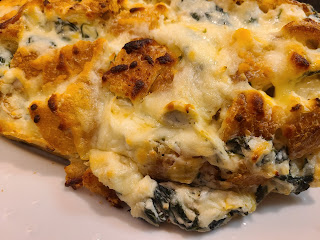
Just look at all that cheesy, spinach-y, artichoke-y goodness. On bread!!!! This is a carb and cheese lover's dream. This would be perfect for your SuperBowl party this weekend. 

Oh you're not having a party? Will you be there? Good enough reason. Make this bread.

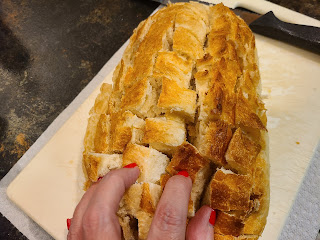
It's really not very complicated at all for such a tremendous result. First, make your dip - full directions below.  Then cut a grid pattern in the bread. See how it has all these squares now?


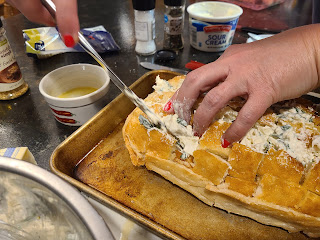
Butter this up then stuff away! Take that dip and get it in all the crevices of the bread. Your hands WILL get messy. That's the goal. Pull that bread apart and poke that dip down in there. I found it was easiest with a regular table knife. Be a little careful so that you don't break all the bread apart, but this is extremely forgiving... no one's going to notice in the end. 


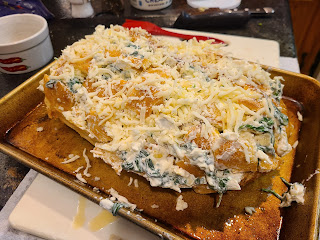
Top that beautifully stuffed bread with more cheese, and then get it in the oven.


Bake, and then get ready to enjoy! You can just pull apart pieces of the bread, or you can provide a knife if you want to be more civilized about it. 


If for some reason you don't eat all the bread in one sitting (it is very rich!), you can wrap it in foil and then reheat it another day. We did that, and it was just as good the second time. 

It doesn't matter who wins or loses on Sunday. What matters is that you have delicious food to eat. I hope you love this as much as we did!


Spinach and Artichoke Stuffed Bread
1 Tbsp. olive oil
2 garlic cloves, minced
5 ounces baby spinach
3 ounces cream cheese, softened
1/3 cup sour cream
1/3 cup chopped artichoke hearts
4 ounces shredded mozzarella cheese
2 ounces shredded parmesan cheese
1 loaf Italian Bread
4 tablespoons melted butter

Heat the olive oil in a large skillet over medium heat. Add the garlic, and turn down the heat slighly, and cook for 30 seconds or until fragrant. Add the spinach, and cook until it is wilted, about 5 to 6 minutes. Remove from the heat.

In a large bowl, combine the cream cheese, sour cream, artichoke hearts, half of the mozzarella and all the parmesan. Season with salt and pepper to taste. Add the spinach and stir until combined.

Make a grid pattern in the bread by cutting with a serrated knife -- first, long-ways and then crossways. If any pieces fall out, tuck them back in.

Brush the bread and inside the pieces with about 3 Tbsp. of the melted butter. Then gently stuff the spinach mixture into the grid pattern. It's easiest to do this with a butter/table knife. You want the dip pretty evenly distributed so try to get it down into all the crevices. 

Sprinkle the remaining mozzarella on top, then drizzle with the remaining Tbsp. of butter.

Bake at 400 for 15-20 minutes until bubbly. 

Recipe Source: Adapted from How Sweet Eats

Monday, January 31, 2022

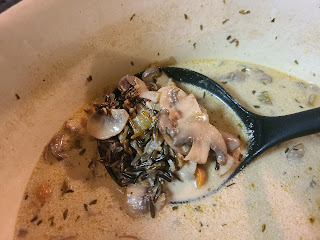
Mushroom Wild Rice Soup


We are eating a lot of soup this year. I have my tried and true favorites that are regulars in the rotation, like butternut curry soup, shrimp and corn chowder, creamy white chicken chili, lasagna soup, sweet potato and sausage soup, and miso meatball and noodle soup, but I also like to try new ones.


As someone who loves wild rice and mushrooms, I was sure that this would be a winning recipe. And I was right!


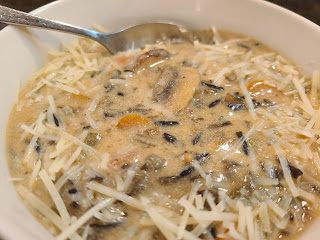
Chock full of two different kinds of mushrooms, as well as carrots, celery and onion, this soup is sure to warm you up on a chilly night and surprise you with its deliciousness.


It's also meatless! So if you try to eat at least one meal a week that doesn't have meat, this would fit the bill perfectly. And it's so hearty that no one will miss the traditional chicken in wild rice soup.


Because wild rice needs a long time to cook to fully open up, this soup is not a 30 minute meal. But it will be worth the wait, I promise. There's not more than 30 minutes worth of "work," but there's the simmering time.

I think this soup could be adapted quite easily for the crock pot, so if you try that, let me know how it goes!

Mushroom Wild Rice Soup

5 tsp. olive oil, divided
8 oz. baby bella mushrooms, sliced
8 oz. white button mushrooms, sliced
4 tsp. salt, divided
2 Tbsp. butter
1 large white onion, diced
4 celery stalks, ends trimmed, diced
3 medium carrots, diced
3 garlic cloves, minced
1 cup wild rice 
1 tsp. dried thyme
2 Tbsp. balsamic vinegar
1 Tbsp. Worcestershire sauce
3 cups beef broth
1 cup half and half
Freshly shredded Parmesan cheese, for serving

In a large Dutch oven or soup pot with a lid, heat 2 teaspoons of the olive oil over medium heat.

Add baby bella mushrooms and sprinkle with 1 teaspoon salt. Stir to coat and cook, stirring occasionally, until mushrooms have released their natural moisture, it has evaporated and mushrooms are browned. Remove mushrooms from pot and set aside. Repeat the browning process with another 2 teaspoons of olive oil, button mushrooms and 1 teaspoon salt. Remove from pot and set aside. 

Add the final teaspoon of oil to the pot, along with the salted butter. Add onion, celery, carrot, and final teaspoon salt, stirring to coat. Cook, stirring occasionally, until vegetables have begun to soften, about 5 minutes. If necessary, add a splash of stock to deglaze the pot and get the browned bits off the bottom. Stir in garlic, cooking until fragrant, about 1 minute more.

Add wild rice. Then, stir in thyme, balsamic vinegar and Worcestershire sauce. Stir in beef stock and bring mixture to a boil. Cover and simmer 40-60 minutes, or until rice is tender and has absorbed most of the liquid. Stir in half and half and reserved mushrooms. Top with freshly grated Parmesan cheese to serve.

For a thicker soup, make a cornstarch/water slurry and and thicken before serving. 

Recipe Source: Adapted from Kemp's
Powered by Blogger.